If you have more than one Contact connected as a Pepperi Buyer for the same Account, and you want each Buyer to have their own Wishlist which they can add/remove items from, then you need to configure the Wishlist by buyer email.
If you have Wishlist per Account that other profiles are using, then you can configure a separate table for the Buyer wishlist, and use that field in the Buyer's Transaction Type.
For example:
Configure a Wishlist table for Sales Reps by Account ID
Configure an additional Wishlist table for Buyers by Buyer Email
To configure Wishlists by Account ID (all users ordering for this Account will see the same items added to the wishlist) see: Setting up a Wishlist per Customer
To configure a Wishlist for multiple Buyers for the same Account:
The Wishlist filter is configured via a table consisting of a list of items for each buyer, where each item that is flagged as true is saved in the buyer's Wishlist. Items may be flagged within the catalog on the app via this checkbox field, and updates to the wishlist are then saved back to the user defined table.
To create a Wishlist filter per Account:
1. Create a UDT called "Wishlist for Buyers" (create only, no data loading required)
2. Create a custom checkbox field that queries the UDT to find out if each item is/isn't in the buyer's Wishlist
3. Add the custom checkbox field to the Order Center View you require
4. Create a Wishlist filter (NEW filters only) and indicate the filter criteria to be all items whose checkbox value=true.
1. Create a UDT called "Wishlist for Buyers"
You only need to create the UDT in the Pepperi backoffice (not upload any data to it). The data will be written there automatically as customers add items to their Wishlist.
Settings -> Configuration Files -> User Defined Tables
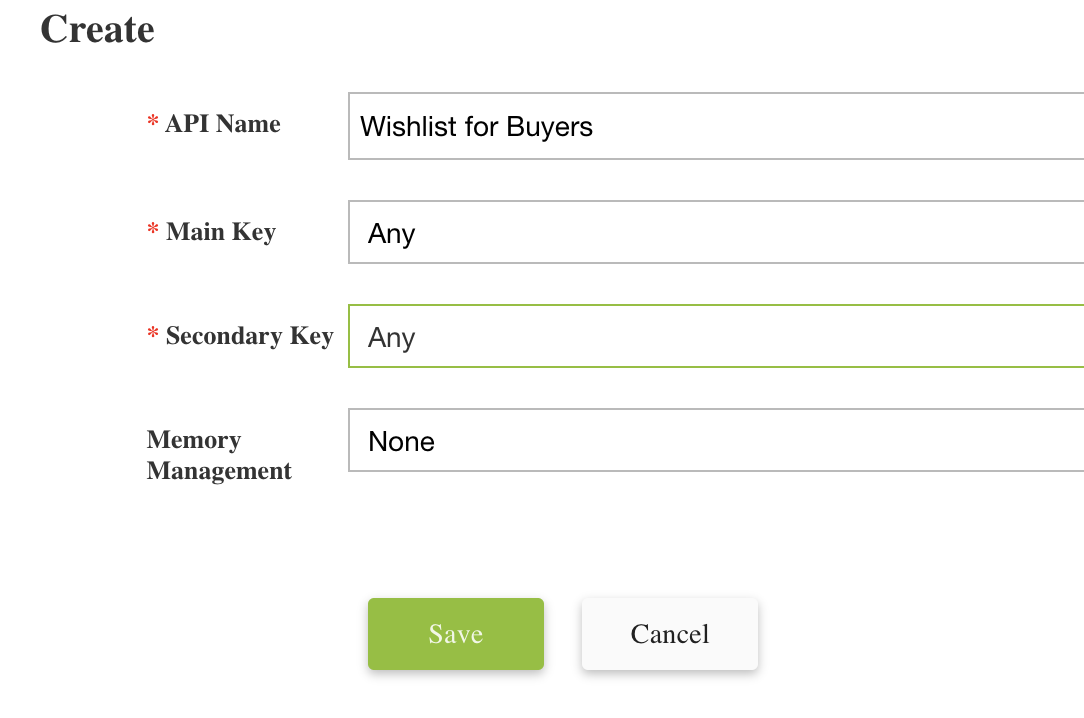
Click +Add and define the UDT as follows:
API Name - provide any name for your UDT
Main Key - select Account External ID (because the first lookup key will be by Account since every Account has different items in its list)
Secondary Key - any
2. Create a custom Checkbox type field (this is a boolean field)
Create a custom Transaction Line-Item field in the Transaction Type you wish to create the Wishlist filter in. The field will query the Wishlist for Buyers UDT to check which items should be in the Wishlist.
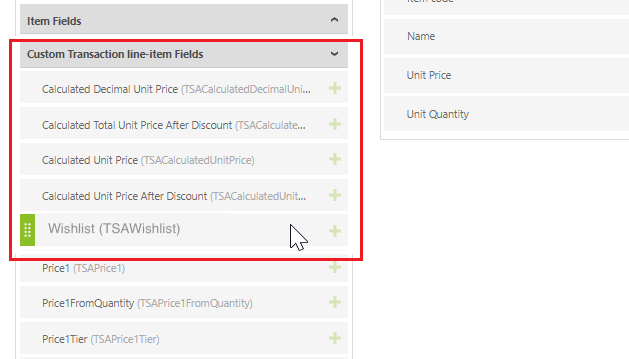
In the Fields tab of the Transaction Type, add a Transaction Line-Item custom field:
Select Checkbox
Select UDT
Checked Display Text - if you want users to see an emoji icon when adding/removing an item from the wishlist, add the options for checked/unchecked. For example: a ❤ for checked, and a ➕ for unchecked. (To access emoji icons on your keyboard you can type the "Windows key" and "." and a window of emoji will come up allowing you to select). If you don't enter any text or emoji, the default is a standard checkbox.
User Defined Table Object - select the UDT name you created in step 1.
Main Key - select Transaction.Agent.Email
Secondary Key - select Item.ExternalID
Get data from column number - enter zero ("0"), because there is no delimiter, since there is only one value in the "Value" column.
Make sure to check "Save the updated value to the UDT", this ensures that items that are subsequently added/removed from the wishlist on the app are updated in the table.

3. Add the custom checkbox field to any View layout of the order center
Add the checkbox field to the layout of any View in the Order Center so that it can be checked and unchecked as needed for the wishlist.
In the same Transaction Type where you created the custom field, open the Order Center Views and edit the required View.
Position the custom Transaction line-item field in the layout:
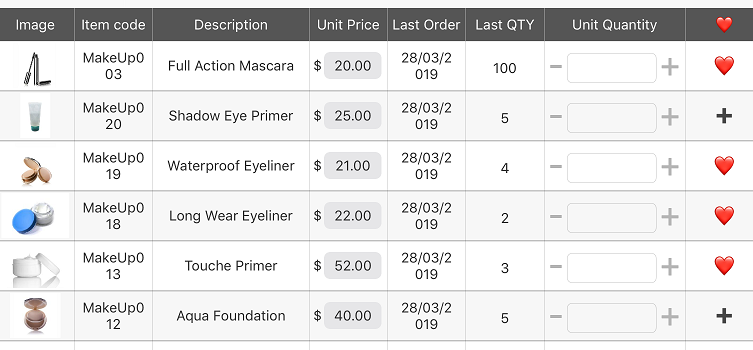
Wishlist field with checked value as ❤ and unchecked as ➕ in Order Center Grid View:
4. Create a Wishlist filter and indicate the filter criteria to be all items whose checkbox value=true
Wishlist filters must be created using the NEW filters only, since they require filtering by custom fields.
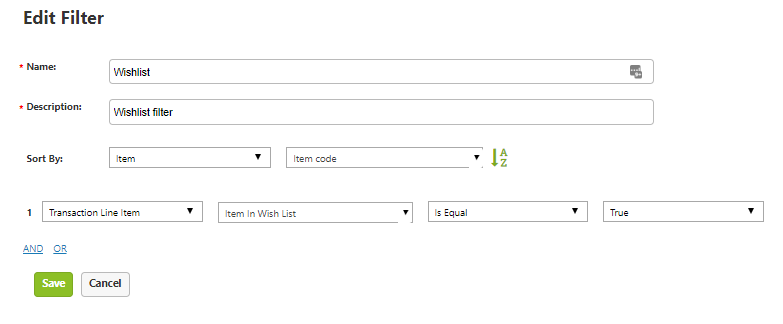
Go to Items -> Filters and add a new filter.
Filter by the custom field you created above to equal "true", so only items with the value true
(or 1) in the UDT will be displayed in this filter.
NOTE: If you have Matrix items (items with Styles and variants) in your catalog that could potentially be added to a wishlist, you will need to include a Transaction Parent Line Item definition in the Filter for the Style codes.
![]()
If you have both Matrix and non-Matrix Items that could potentially be added to a wishlist, include both Line Item and Parent definitions with an "OR" condition, so that both cases will be included:

You must add the Filter to the catalog - even if you are using only the Default catalog (you must be using the New Filters for this capability to be available).
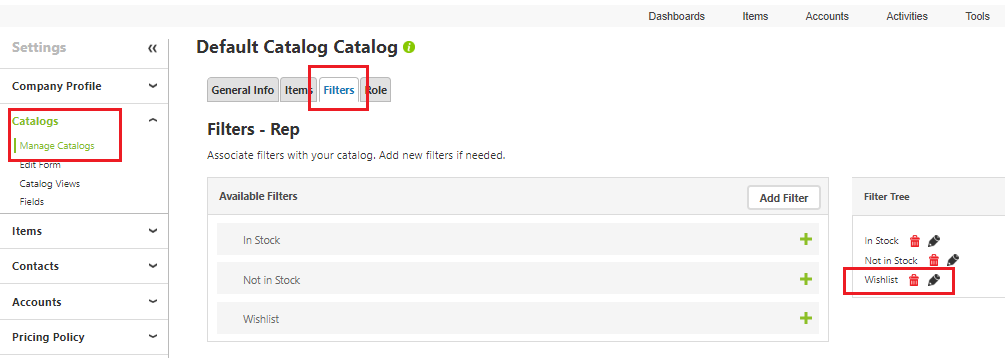
Go to Catalogs -> Edit the catalog you wish to include this filter in.
In the Filters tab, add the Wishlist filter to the layout:
0 comments
Please sign in to leave a comment.