Activities allow you to create your own forms for reps, merchandisers or other types of users (ie buyers) to carry out in Pepperi mobile or web app.
Examples of Activities include:
- In Store Audit
- Customer survey
- Contact Us form for buyers on the Storefront
- Product survey
- Service request
- Any other CRM type forms in your workflow
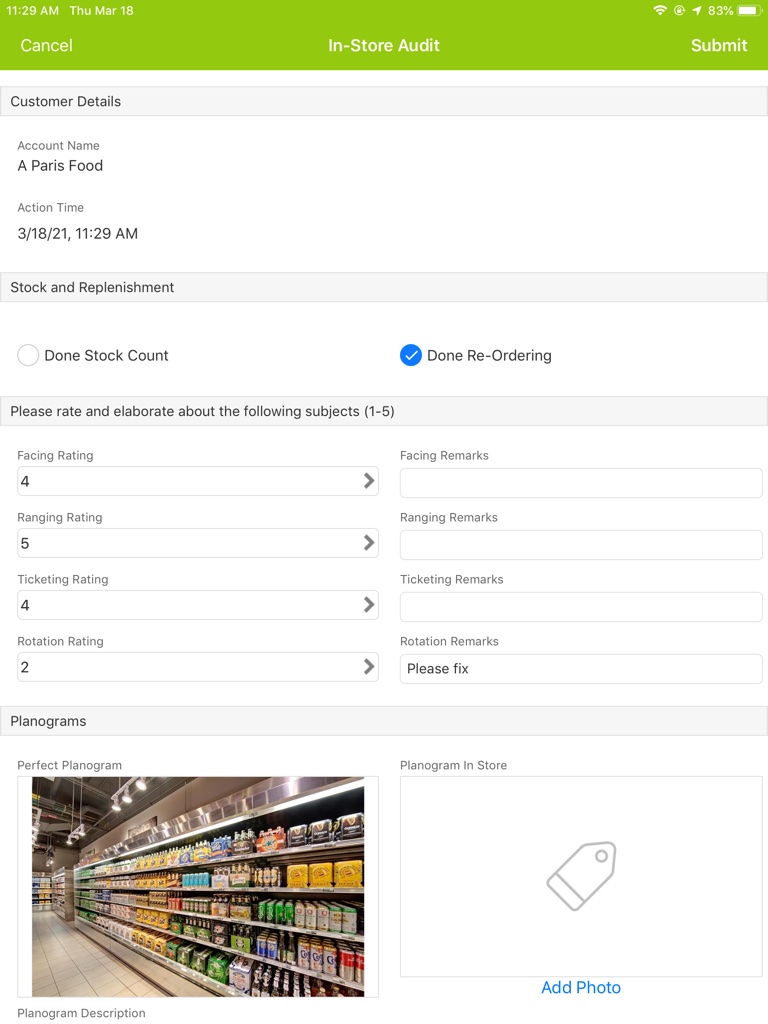
Ex. Activity Form - In-Store Audit
Activities may be positioned on the Account Dashboard in the Activities Toolbar or Menu, and as buttons on the app home screen.
This article explains all the steps in creating an Activity:
Add the new Activity - select an icon and share settings
Add fields to the Activity form and configure the form for all relevant profiles
Create Activity List to view reports on this Activity
Add New Activity
Go to Settings -> Sales Activities -> Activity Types and click "+ "
Fill in a Name and Description for the activity.
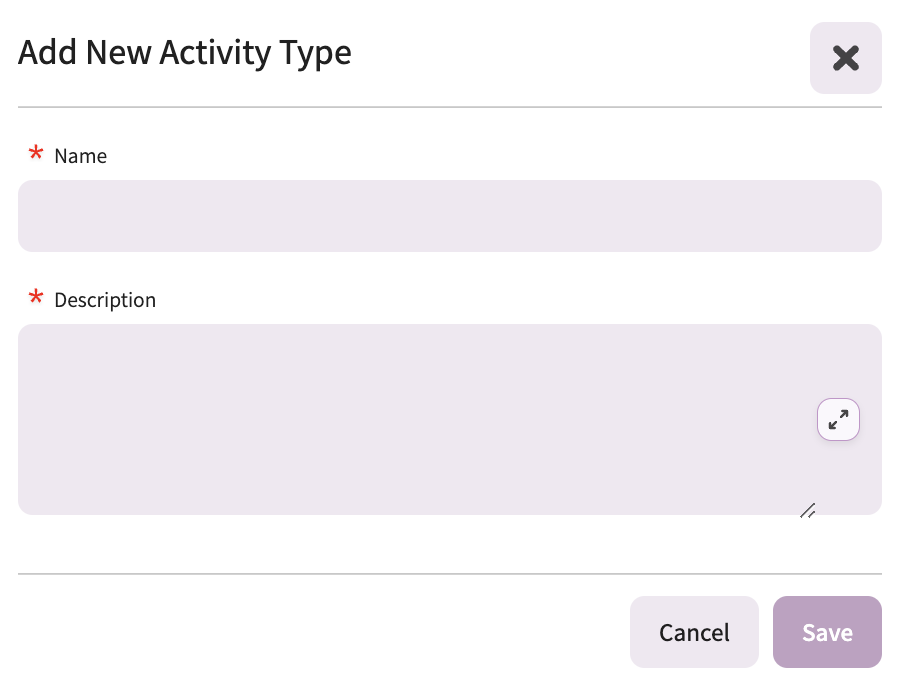
Select an icon that represents your Activity. This icon will appear only on the Account Dashboard on the app.
Click Save.
An option for Sharing will appear at the bottom of the General Tab

Select "Share this Activity among all sales reps assigned to an Account" if you have assigned multiple sales reps to the same Account and you want them to be able to view this Activity whenever it is executed by any one of them for shared Accounts.
(This share is not relevant to "Sales orders" or other Transactions. To share these kinds of transactions you need to use the "Share" in the settings tab of the Transaction Type. For details see: How to Assign Accounts to Multiple Sales Reps and share orders.)
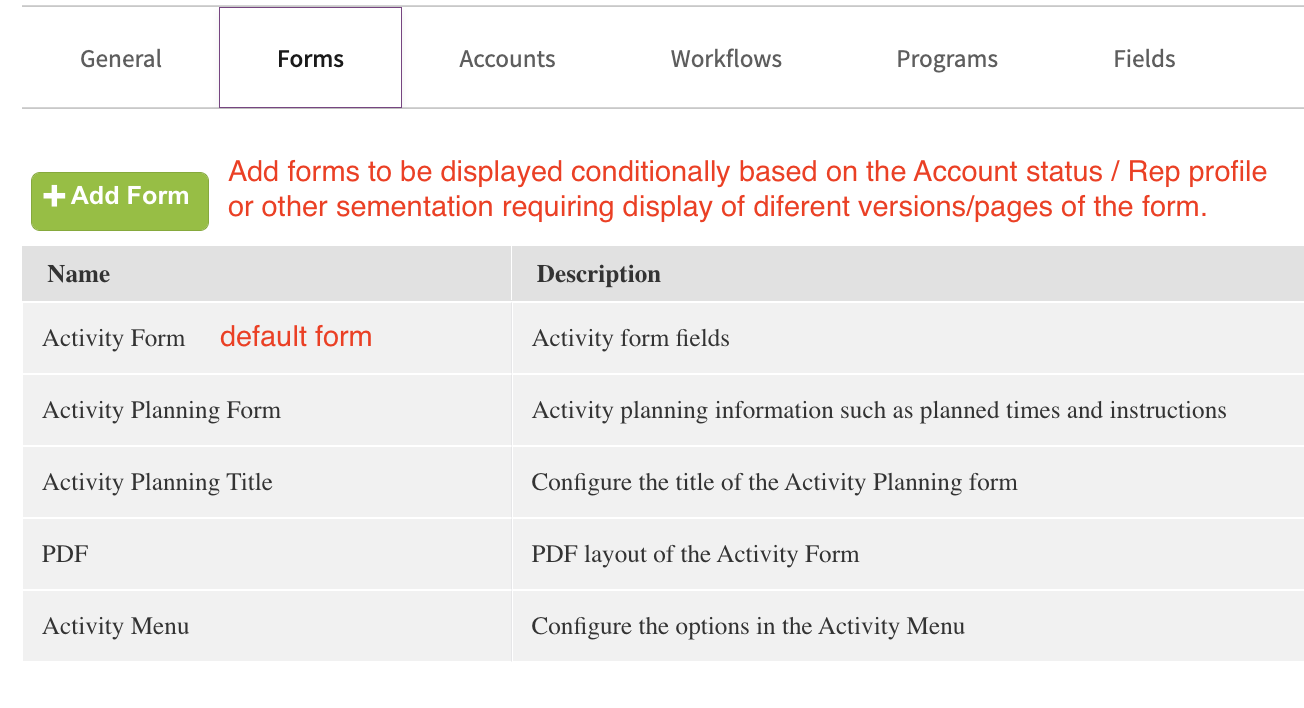
Forms Tab
Add fields to the Activity form and configure the form for all relevant profiles
Here you will define the fields that will appear on the form for this activity. You may also create additional alternative forms if necessary and display them depending on the status or user profile viewing/editing the Activity.
For example while filling out a Store audit form a merchandiser may check a box that requires additional pages to be filled in. Those forms can then be displayed conditionally.
To use alternative forms, you will need to create them in the forms tab and then define when to display them in the Activity's Workflow using Alternative Activity Forms.
Each profile has a form (if you have created additional profiles you will need to add a form for each, otherwise the Rep form will be used as the profile's default. For more info on profiles see: Profile Management):
Rep - the form that the sales rep will see when they carry out the activity on Pepperi app.
Admin - the form that the Pepperi Web Admin will see when the activity detail is viewed.
The form will present you with Available Fields that are standard fields you can add to the activity.
These are informative fields that you can display in your activity form.
- Activity fields
- Agent fields
- Account fields
- Contact person fields
The main fields in your Activity will most probably be custom fields, since these are the questions and fields that need to be filled in which you will customize for your needs depending on the purpose of the form.
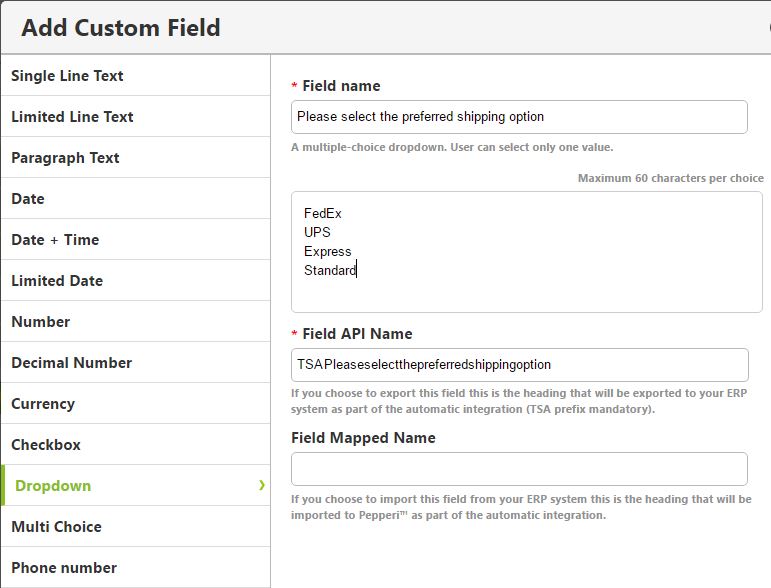
In order to add custom fields to your form click "Add custom field?" and add the field types that are required.
There are types of fields that can be added - text, decimal, paragraph, drop down, image, and more.
For each field type decide on the field label and enter it in the box.
Then enter any additional information necessary for the field.
Some fields only require a label, others may require more information such as:
Choices for the Dropdown menu, the number of characters to limit the Limited Line Text, etc...
After adding each field, click Save.
Add as many fields as you require.
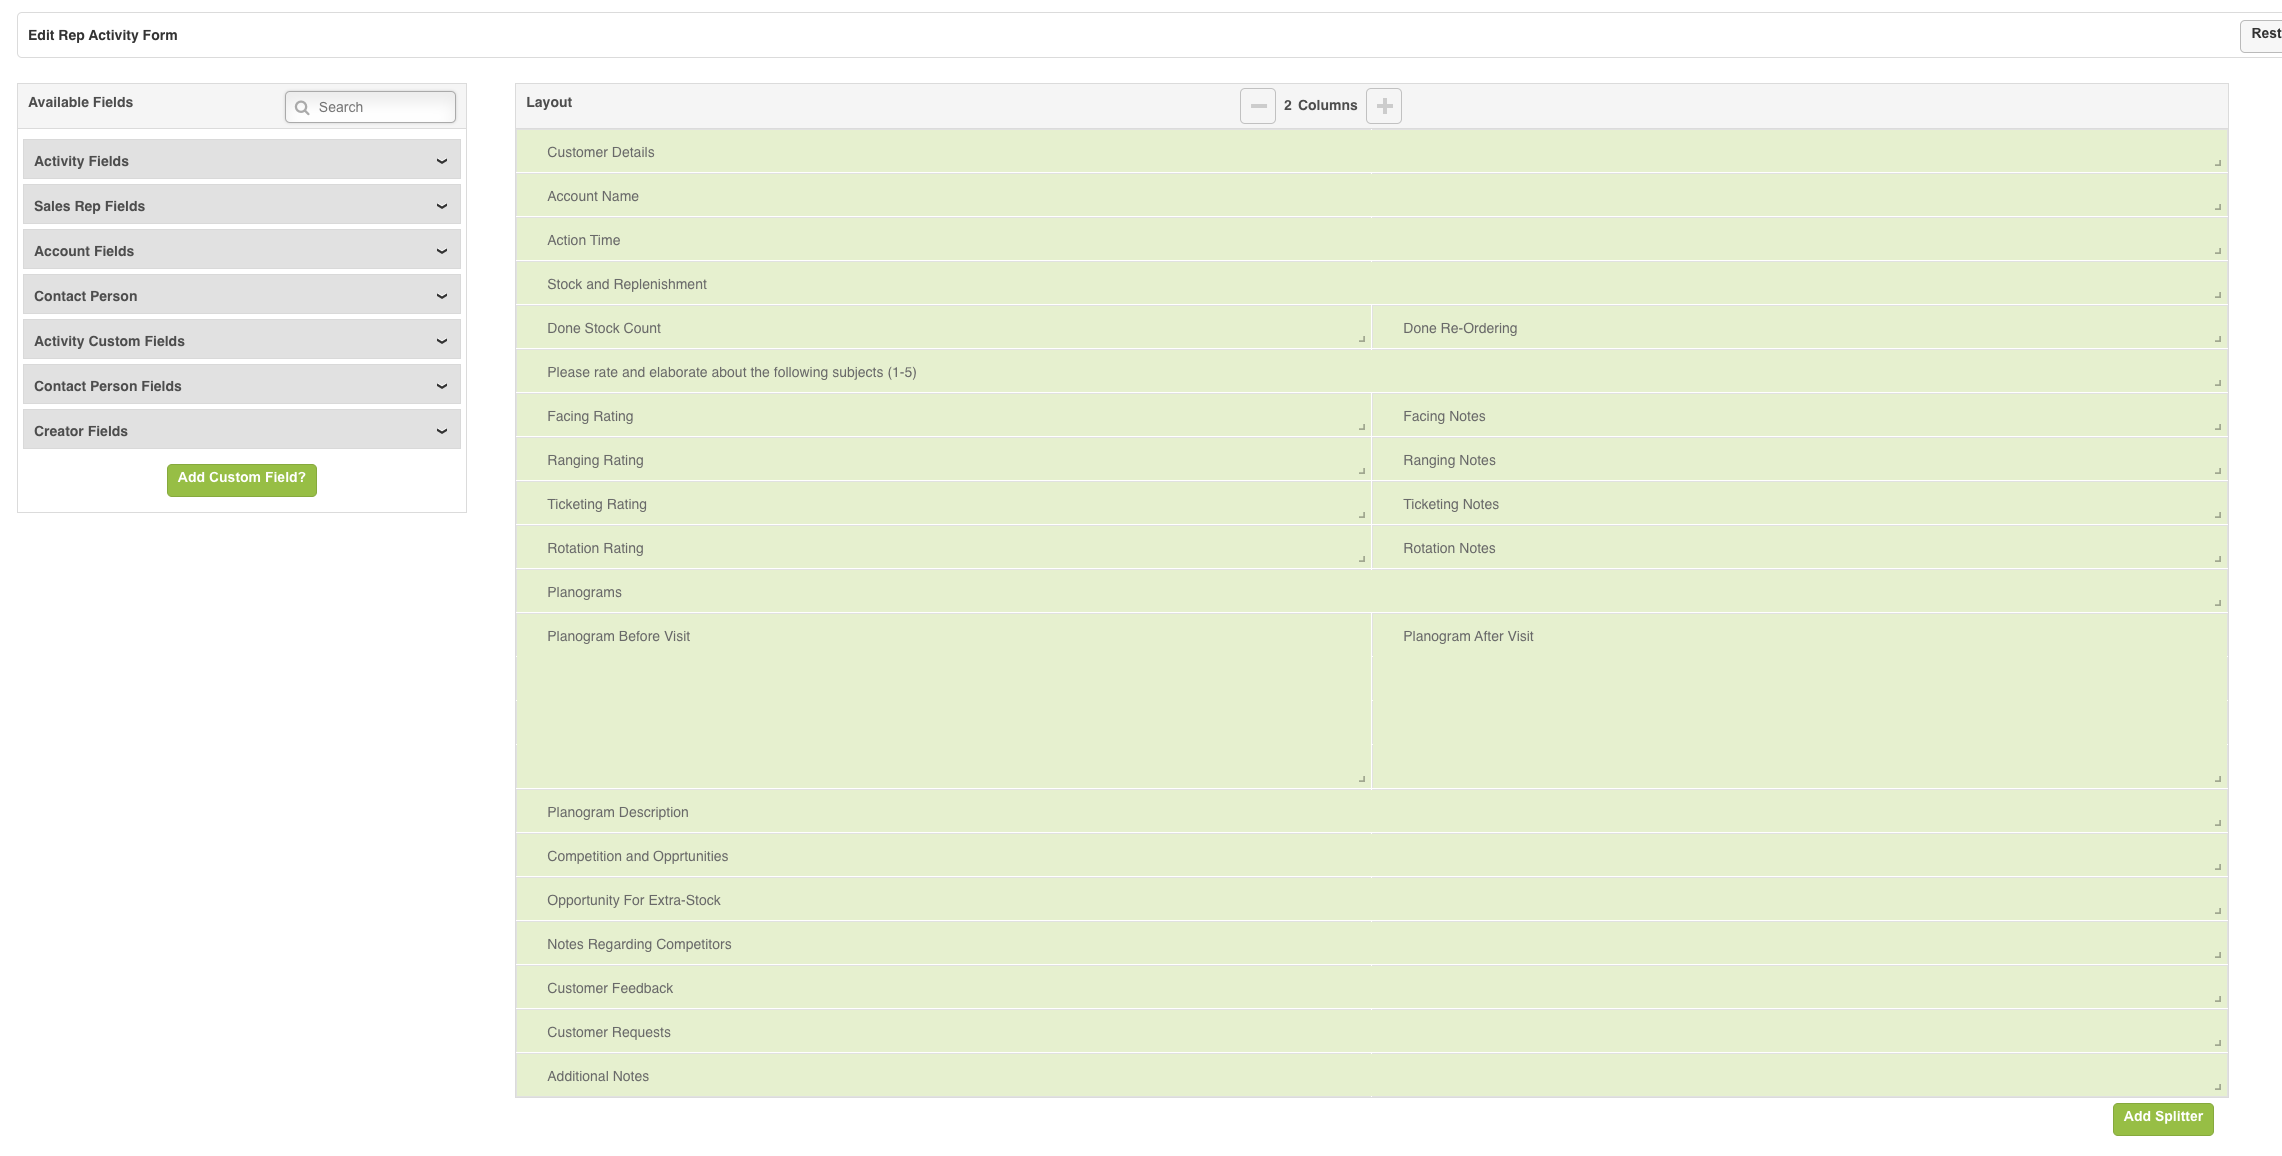
Position the fields in the form layout for the Activity:
Activity forms can be formatted in 2 columns. To stretch a field across the full width of the form drag it to take up the whole space in the layout area.
To align 2 fields side by side minimize and drag to the desired position.
Click on the pencil icon next to the field and the Read only and Mandatory options will display.
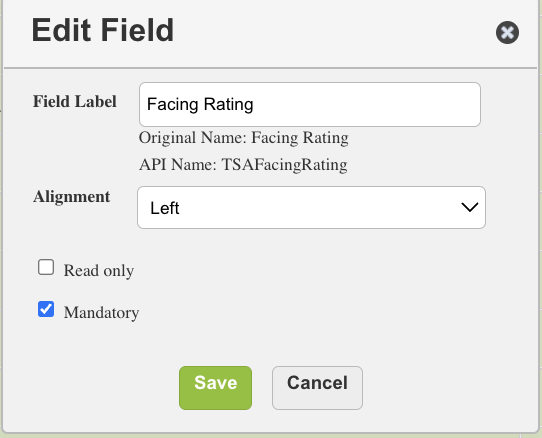
- You can rename the title of the field.
- You can mark the field as Read only or as Mandatory (the activity will not be able to be saved unless the field is filled in).
Splitters
Splitters are simple fields you can enter text into for the purpose of giving headings to the different sections of a form, or instructions to the user, if needed.
Click "Add Splitter" to position a Splitter field, and type in the text to be displayed.
For example the form above is divided into Customer Details, Stock and Replenishment, Planograms and instructional text "Please rate and elaborate on the following subjects (1-5)".
To view a list of all the custom fields you created go to the Fields tab of the Activity:
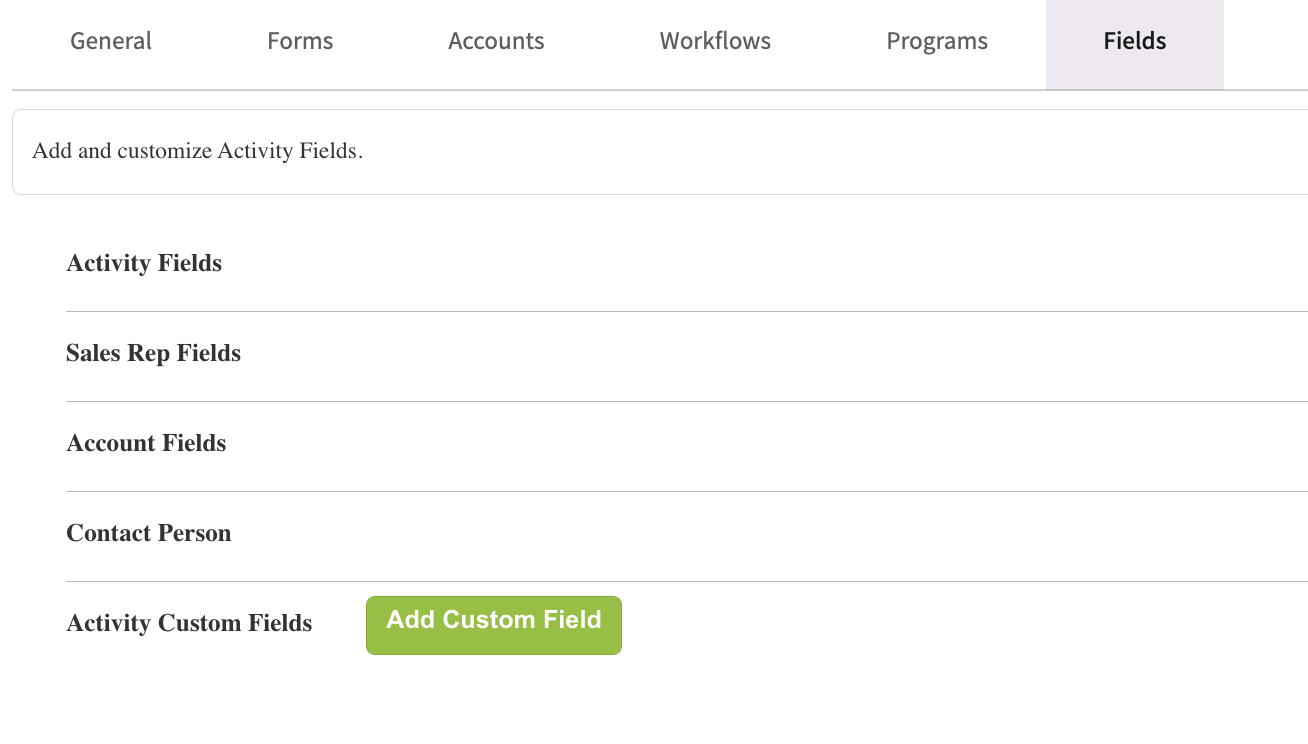
You can edit the field labels and properties from this listing by clicking on the pencil icon in the Actions column.
You can delete a field by clicking on the bin icon in the Actions column.
To customize the PDF form which will be attached to the email notification about the Activity follow instructions below:
PDF - the information displayed on the PDF copy of the Activity that can be either automatically emailed or displayed on the tablet for preview/print/emailing.
Edit the PDF form and add all the fields that should be included in the PDF copy (typically these will be the same fields you added to the form). Drag all fields you wish to display to the layout and click Save.
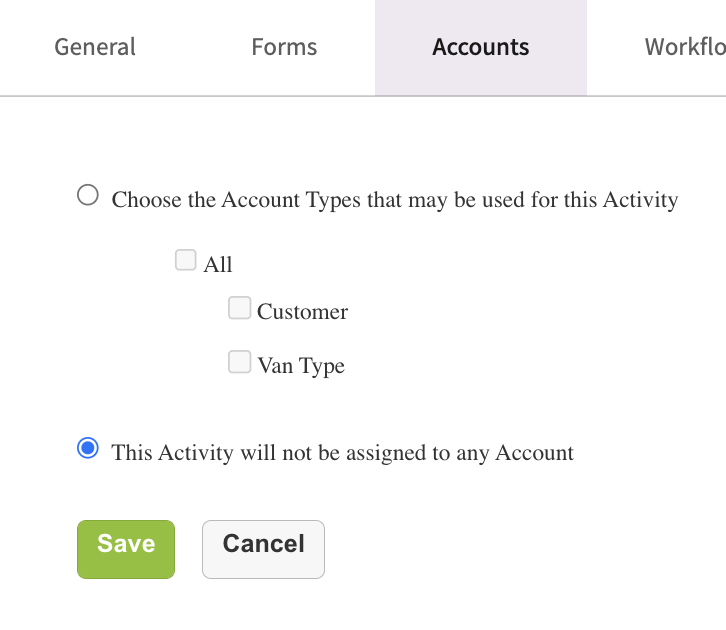
Accounts Tab (relevant only if you are using Account Types)
The Accounts tab allows you to select which Accounts this Activity can be executed for. In most cases the Activity will be available to all Acocunt Types. If you are using Account types to manage inventory across multiple warehouses, van sales, or have several customer types - the Activity can be made available for the relevant Accounts only (this will override the Activities you have positioned on the user's Account Dashboard, and show only the ones relevant to each Account).
Another option in the Accounts limitation, is not to associate the Activity with no Account at all. This is useful if you wish to capture information that is not tied to an existing customer, for example prospects at a trade show. For details on this see: Efficiently Capture Potential Buyers at Trade Shows.
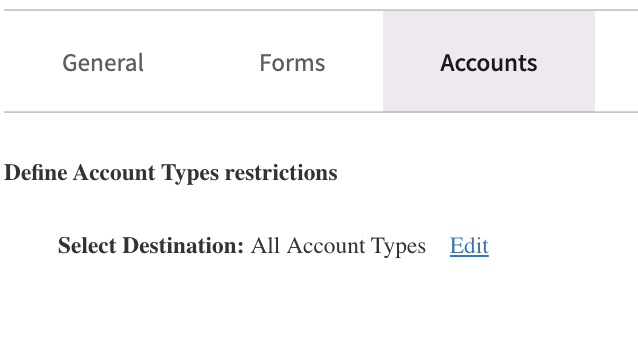
Click Edit, and select the Account Types, or "This Activity will not be assigned to any Account"
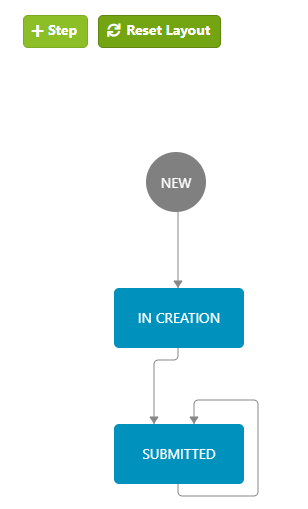
Activity Workflow
Configure the Workflow transitions and actions for the Activity. For example, configure an email notification action when the Activity is submitted to receive notification with a PDF attachment of the Activity form content. For details on configuring workflows see: Workflow Designer.
There is one Workflow action (described in the Workflow Designer) available only for Activity Forms which prompts the opening of the device camera for scanning a UPC barcode. For example:
- Scanning a store's barcode label when starting a store-audit activity, to confirm that the merchandiser is in the store.
- Scanning a refrigerator, an aisle or any other type of display unit to indicate which display is being reported on.
To automatically guide the user through multi-page forms, and dynamically open up the relevant next page, use Alternative Forms. You'll need to create multiple Activity Forms in the Forms tab, then configure each status and condition in the Workflow. For details see: Alternative Activity Forms.
Activity Menu
The Menu configuration allows you to indicate the options you want to make available to the user when previewing this activity within Pepperi app on the tablet.
Drag the "PDF" option to the layout in order to make a PDF preview option available to the user. This will allow the user to view/print/email a PDF copy of the form straight from the app.
If you have automatic emails being sent in the Workflow tab the PDF will also be emailed to the configured destinations. This does not affect the Menu option which simply allows previewing of the PDF.

Position the Activity on the Activities toolbar or Home Screen on the Pepperi app so users can access it.
To make the Activity available to users you must include it on the Account Dashboard Layout in the Activities Toolbar, Menu or on the Home Screen. For details on how to do this: Account Dashboard Layout or Home Screen Layout
Your Activity is now ready for users to access and execute.
Create Activity List to view a report on this Activity
Create an Activity List for quick reporting and viewing of this Activity. For detailed instructions on adding Activities to Lists: Sales Activity Lists
0 comments
Please sign in to leave a comment.